Binance Tutorial for Beginners 2026: A Step-by-Step Guide
Welcome to the ultimate guide for getting started with Binance, one of the world’s leading cryptocurrency exchanges. Whether you’re new to crypto or looking to explore Binance for the first time, this detailed walkthrough will take you from creating an account to trading, funding, and even earning passive income with your cryptocurrencies. Let’s dive in!
1. Creating and Verifying a Binance Account
Step 1: Sign Up
- Visit binance.com and click Register Now or the Register button at the top.
- Choose to sign up with your email address or mobile phone number.
- (Optional) Use a referral code to get a 10% discount on trading fees. Enter the code in the Referral ID field (check the description of the original tutorial video for the code or use the referral link).
- Enter your email/phone, set a strong password, agree to Binance’s terms, and click Create Account.
- Complete the security verification by dragging the puzzle piece into place.
- Verify your email by entering the code sent to your inbox.
https://youtu.be/DBkvdlAlNDY?si=rAr6SZ7AwZZkOFUz
Step 2: Set Up Two-Factor Authentication (2FA)
To enhance account security:
- Go to your Account icon, select Security, and choose Google Authentication.
- Download the Google Authenticator app (available on iOS App Store or Google Play Store).
- Scan the QR code displayed on Binance using the app to generate a 6-digit code.
- Save the recovery key in a secure place (e.g., on paper) to recover your account if you lose your phone.
- Enter the email verification code and the Google Authenticator code to activate 2FA.
Pro Tip: Avoid using SMS for 2FA to prevent SIM-swapping attacks. For extra security, consider a hardware device like a YubiKey (links to purchase are often provided in tutorials).
Step 3: Enable Anti-Phishing Code
- In the Security section, click Enable Anti-Phishing Code.
- Create a unique code (e.g., “ThisIsNotAScam”) that will appear in all official Binance emails.
- Verify the code using your Google Authenticator app.
- This ensures you can distinguish legitimate Binance emails from phishing attempts.
Step 4: Complete Identity Verification
To fund your account with fiat currency (e.g., USD, EUR):
- Go to Account > Identification and click Verify for Identity Verification.
- Enter your personal details and select a verification method (e.g., passport, ID card, or driver’s license).
- Use your webcam or upload a photo of your ID, then take a selfie for facial verification.
- Complete advanced verification by following on-screen instructions (e.g., nodding or opening your mouth) to confirm you’re a real person.
- Wait for verification approval (usually instant but may take up to 3 days). A Verified icon will appear once approved.
Note: Identity verification is required for fiat deposits but not for crypto-to-crypto trading.
2. Funding Your Binance Account
Option 1: Buying Crypto with a Credit/Debit Card
- Navigate to Buy Crypto > Credit/Debit Card.
- Select your fiat currency (e.g., EUR) and the cryptocurrency you want to buy (e.g., Bitcoin – BTC).
- Enter the amount (e.g., 1000 EUR) and review the estimated crypto you’ll receive.
- Input your card details (number, expiration date, CVV) and complete the payment confirmation.
- The purchased crypto will appear in your Binance wallet.
Warning: Credit card purchases have higher fees (e.g., ~1.8%). Using your account balance is more cost-effective.
Option 2: Funding with Fiat via Bank Transfer
- Go to Buy Crypto > Bank Deposit.
- Choose your fiat currency (e.g., EUR) and select Bank Transfer (0% fee).
- Enter the amount to transfer (e.g., 1000 EUR).
- Use the provided bank details to send funds from a bank account with the same name as your Binance account.
- Include the reference code in the transfer to link it to your Binance account.
- Funds typically arrive within minutes to 1-2 days, depending on your bank. You’ll receive an email confirmation.
Note for USD Users: USD deposits are converted to BUSD (Binance’s USD stablecoin). To buy crypto with USD, use the trading feature (covered later).
Option 3: Depositing Cryptocurrency
- Go to Wallet > Fiat and Spot > Deposit > Cryptocurrency.
- Select the crypto you want to deposit (e.g., Bitcoin – BTC).
- Copy the deposit address or scan the QR code.
- Send the crypto from your external wallet or exchange to this address.
- Ensure you select the correct coin and network to avoid losing funds. Deposits typically arrive within 1-10 minutes.
3. Buying Cryptocurrency with Account Balance
- Go to Buy Crypto > Cash Balance.
- Select the cryptocurrency (e.g., Ethereum – ETH) and enter the amount (e.g., 100 EUR).
- Review the estimated crypto you’ll receive and the low fee (e.g., 0.10 EUR).
- Click Buy [Crypto] and confirm within 60 seconds to lock in the rate.
- The purchased crypto will appear in your Fiat and Spot wallet.
Why Use Cash Balance? It has significantly lower fees than credit card purchases.
4. Converting and Withdrawing Funds
Converting Crypto to Fiat or Other Crypto
- Go to Trade > Convert.
- Select the crypto you want to convert (e.g., Bitcoin – BTC) and the target currency (e.g., EUR or Ethereum – ETH).
- Enter the amount or click Max to use your full balance.
- Preview the conversion rate (valid for ~6 seconds) and confirm.
- The converted funds will appear in your wallet.
Withdrawing Cryptocurrency
- Go to Wallet > Overview > Withdraw > Crypto.
- Select the crypto (e.g., Bitcoin – BTC) and enter the recipient’s wallet address.
- Choose the network (e.g., Bitcoin network) and specify the amount.
- Review the transaction fee and click Submit. Funds typically arrive in 10+ minutes.
Warning: Double-check the address and network to avoid losing funds.
Withdrawing Fiat
- Go to Wallet > Overview > Withdraw > Fiat.
- Select the currency (e.g., EUR) and choose Bank Transfer.
- Enter the amount (e.g., 100 EUR) and your bank account details (IBAN, etc.).
- Ensure the bank account name matches your Binance account name.
- Confirm the withdrawal. Funds will arrive based on your bank’s processing time.
5. Understanding Binance Fees
Binance offers competitive fees, especially at the VIP 0 level (default for most users):
- Maker/Taker Fee: 0.1% for both (market or limit orders).
- Higher VIP levels (unlocked by trading >50 BTC/month) offer lower fees.
How to Reduce Fees
- Referral Code: Sign up with a referral code for a 10% fee discount.
- Pay with BNB: Hold Binance Coin (BNB) in your account and enable the option to pay fees with BNB for a 25% discount.
- Bank Transfers: Use bank transfers (0% fee) instead of credit cards (1.8% fee) for fiat deposits.
Compared to exchanges like Coinbase, Binance’s fees are significantly lower, saving you money over time.
6. Trading on Binance
Binance offers multiple trading interfaces. For beginners, the Advanced Trading Interface is recommended for its simplicity.
Accessing the Trading Interface
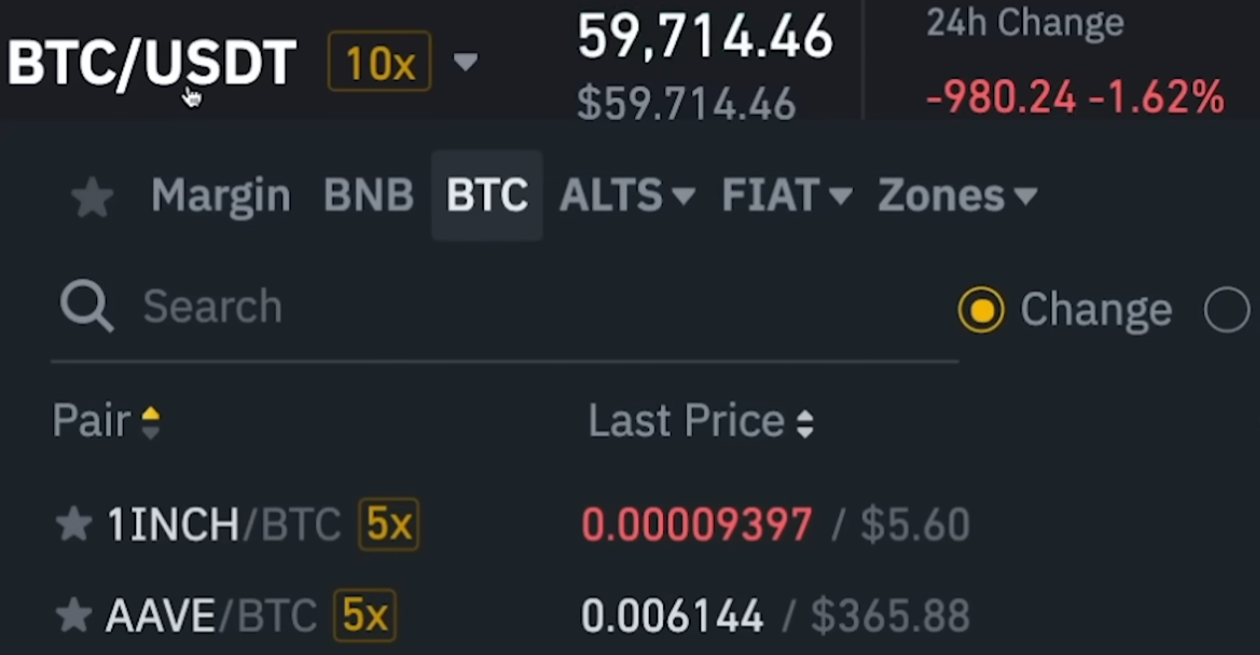
- Go to Trade > Advanced.
- Select a trading pair (e.g., BTC/USDT for Bitcoin vs. USD Tether).
- View the candlestick chart (price movements), order book (buy/sell orders), and recent trades.
Types of Orders
- Market Order: Buy/sell at the current market price for instant execution.
- Example: Buy 100 USDT worth of BTC by selecting Market, entering the amount, and clicking Buy BTC.
- Limit Order: Set a specific price to buy/sell.
- Example: Set a buy order for 1 BTC at 58,000 USDT. The order will only execute if the price drops to 58,000.
Monitoring Trades
- Check your Order History (bottom left) for details on executed trades.
- Open limit orders appear in the Open Orders section until filled or canceled.
Note: Avoid margin trading (leverage) as a beginner due to high risks.
7. Earning Passive Income with Binance Earn
The Binance Earn program lets you earn interest on idle cryptocurrencies, similar to a savings account.
How to Start
- Go to Finance > Binance Earn.
- Choose between:
- Flexible Terms: Withdraw anytime, lower interest (e.g., ~1-2% annually).
- Fixed Terms: Lock funds for 7-90 days for higher interest (e.g., 6.31% for 7 days, 7% for 90 days).
- Select a cryptocurrency (interest rates vary by coin) and click Transfer to allocate funds.
- (Optional) Enable Auto-Transfer to automatically move idle crypto to the flexible savings account.
Why Use Binance Earn?
- Earn passive income without trading.
- Flexible terms allow easy access to funds.
- Fixed terms offer higher yields for longer commitments.
Coming Soon: Look out for in-depth tutorials on advanced Binance Earn features like Launchpool and BNB Vault.
Final Thoughts
Binance is a powerful platform for buying, trading, and earning interest on cryptocurrencies. By following this guide, you can:
- Set up a secure account with 2FA and anti-phishing measures.
- Fund your account with fiat or crypto at minimal cost.
- Trade efficiently with low fees using referral codes and BNB.
- Earn passive income through Binance Earn.
For more crypto tutorials, subscribe to relevant channels or check the original video’s description for additional resources. Happy trading!
Disclaimer: This guide is for informational purposes only and not financial advice. Always conduct your own research before investing in cryptocurrencies.
Post Comment